Building your first piece of fine furniture represents a significant milestone in any woodworker’s journey. The transition from simple projects to heirloom-quality pieces requires not just improved technical skills, but a fundamental shift in how you approach every aspect of the craft. This comprehensive guide walks you through the essential knowledge and techniques needed to create furniture worthy of passing down through generations.
Understanding Wood Selection at a Deeper Level
Understanding Wood Selection at a Deeper Level has gotten complicated with all the conflicting advice flying around. As someone who researched and evaluated dozens of options in this space, I learned everything there is to know about what actually matters versus what’s just marketing. Today, I’ll share the real insights.
The foundation of any exceptional piece of furniture lies in the wood itself. While beginners often select lumber based solely on appearance and price, experienced furniture makers evaluate multiple factors that affect both the building process and the finished piece’s longevity.
Moisture content stands as perhaps the most critical consideration. Wood in equilibrium with your shop’s humidity level will remain stable after construction. Wood that’s too wet will shrink as it dries, opening joints and potentially cracking panels. Most fine furniture woods should read between 6-8% moisture content on a quality moisture meter before you begin cutting.
Grain orientation affects both strength and appearance. Quartersawn lumber, cut perpendicular to the growth rings, expands and contracts less than flatsawn boards and displays distinctive ray flecks in species like oak and sycamore. For tabletops and panels where stability matters most, quartersawn stock justifies its premium price.
Beyond moisture and grain, examine each board for internal stress. Boards that bow or twist after initial cutting reveal tension that will continue causing problems throughout construction. Test suspicious boards by cutting a few inches off one end. If the remaining piece moves noticeably, consider that board compromised for precision work.
The Critical Importance of Milling
Professional furniture making begins with properly milled stock. Rough lumber from the mill, regardless of how straight it appears, requires careful processing before layout and joinery can begin.
That’s what makes this endearing to us woodworkers — understanding these details helps make better decisions.
The milling sequence matters enormously. Start by flattening one face on the jointer, creating a reference surface. Then run that face against the jointer fence to straighten one edge. With two perpendicular flat surfaces established, the planer can create parallel faces, and the table saw can rip parallel edges.
Rushing this process creates compound problems throughout the build. Slightly out-of-square stock produces joints that never quite close, panels that twist under clamp pressure, and assemblies that fight against themselves. Budget adequate time for milling, typically 10-15% of total project hours for complex pieces.
After initial milling, allow boards to rest overnight before final dimensioning. This pause lets internal stresses released during milling manifest as movement. A second pass through the jointer and planer the following day produces the flat, straight stock that precision joinery demands.
Mastering Traditional Joinery
While modern hardware and biscuit joiners have their place, furniture that lasts centuries relies on time-tested wood-to-wood connections. Understanding why traditional joints work helps you execute them successfully and adapt them for specific situations.
Mortise and Tenon Fundamentals
The mortise and tenon joint forms the backbone of frame construction in tables, chairs, and case pieces. Its strength comes from long-grain to long-grain glue surface combined with mechanical interlocking that resists both tension and racking forces.
Proper proportions matter greatly. The tenon thickness should equal approximately one-third of the stock thickness, leaving adequate material on both mortise walls. Tenon length typically matches or slightly exceeds the mortise member’s width, maximizing glue surface without weakening the surrounding wood.
Fit takes precedence over everything. A well-fitted mortise and tenon should slide together with hand pressure but resist falling apart when inverted. Too tight risks splitting the mortise during assembly; too loose leaves gaps that weaken the joint and look unprofessional.
Dovetail Mastery
Dovetails represent perhaps the most recognized symbol of fine craftsmanship. Beyond their aesthetic appeal, these interlocking joints provide exceptional resistance to the forces that drawers experience during daily use.
The joint’s strength comes from the wedge-shaped tails locking into corresponding pins. This mechanical connection holds even if the glue fails entirely, making dovetails the gold standard for drawer construction and certain case joints.
Hand-cut dovetails allow customization impossible with jigs. Vary pin spacing for visual interest, adjust angles to suit different woods, and create half-blind versions that hide the joint on drawer fronts while maintaining full strength.
Probably should have led with this section, honestly.
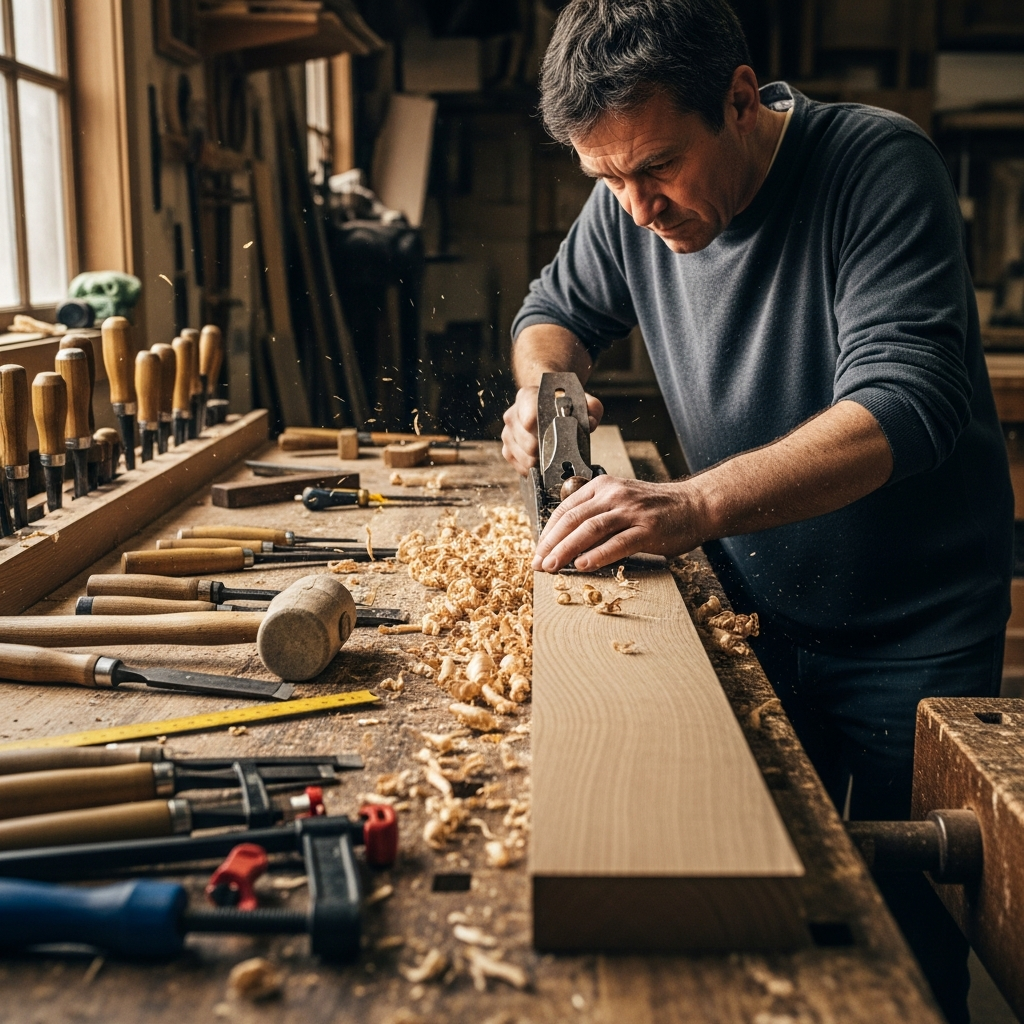
Surface Preparation Excellence
The difference between amateur and professional furniture often shows most clearly in surface quality. No finish, regardless of cost or complexity, can compensate for poor surface preparation.
Begin surface prep with a properly tuned hand plane. A sharp, well-adjusted smoothing plane produces a surface quality that sandpaper cannot match. The plane severs wood fibers cleanly, while abrasives tear them, creating microscopic fuzz that raises under finish and dulls the wood’s natural luster.
When sanding becomes necessary, progress through grits systematically. Skipping grits leaves scratches from the previous stage that only become visible under finish. A typical progression moves from 120 to 150 to 180 to 220 grit, with each stage removing scratches from the previous.
Between grits, raise the grain with a damp cloth and allow the wood to dry completely. This swells loose fibers to the surface where the next sanding stage removes them. The resulting surface accepts finish evenly without blotching or raised grain.
Finishing for Longevity
Fine furniture deserves a finish that protects the wood while enhancing its natural beauty. The finish selection should match both the piece’s intended use and your aesthetic goals.
Oil finishes penetrate the wood surface, providing protection from within while allowing the natural texture to remain tactile. Danish oil, tung oil, and various oil-varnish blends fall into this category. They’re forgiving to apply and simple to repair but offer less protection against water and wear than film finishes.
Film finishes sit on the wood surface, creating a protective barrier. Shellac, lacquer, and varnish each offer different balances of durability, appearance, and ease of application. Shellac provides warmth and depth but limited water resistance. Lacquer dries quickly for production efficiency but requires spray equipment. Varnish offers maximum protection but demands patience during application and curing.
Application technique matters as much as product selection. Thin coats cure faster and more thoroughly than thick ones. Sanding between coats provides mechanical adhesion and removes dust nibs. Building finish gradually produces results far superior to attempting coverage in one or two heavy applications.
Design Principles for Timeless Pieces
Technical skill alone doesn’t guarantee beautiful furniture. Understanding fundamental design principles helps you create pieces that satisfy visually as well as functionally.
Proportion establishes the relationship between a piece’s dimensions. The golden ratio, approximately 1:1.618, appears throughout nature and architecture, providing inherently pleasing proportions. While not a rigid rule, considering this ratio during design often improves visual balance.
Visual weight affects how furniture feels in a space. Massive legs under a delicate top look unbalanced, as does a heavy top perched on spindly supports. The relationship between components should feel logical and harmonious.
Negative space, the areas between and around solid elements, deserves as much attention as the wood itself. The gaps in a chair back, the reveal between a drawer and its surrounding frame, and the space beneath a table all contribute to the overall composition.
Building for Seasonal Movement
Wood moves. This fundamental fact cannot be engineered away, only accommodated through thoughtful design and construction. Ignoring wood movement guarantees eventual failure, while respecting it creates furniture that remains sound for centuries.
Cross-grain construction creates problems because wood expands and contracts significantly across the grain but almost not at all along it. Tabletops attached rigidly to aprons will crack as the top moves and the aprons don’t. Solid-wood panels glued into frames will split or push the frames apart.
Solutions vary by application but share common principles. Tabletop fasteners, also called buttons or figure-eight connectors, allow tops to expand while remaining attached. Floating panels in frame-and-panel construction sit in grooves without glue, free to move with humidity changes. Breadboard ends, when properly executed, guide movement while keeping wide panels flat.
Learn typical seasonal movement values for your species and climate. A 12-inch red oak panel might move a quarter inch between summer humidity and winter dryness. That movement must go somewhere, and good design ensures it goes where it causes no harm.
Developing Your Workshop Rhythm
Fine furniture making requires sustained focus over extended periods. Developing efficient work habits and shop organization supports this focus while reducing errors and accidents.
Batch similar operations whenever practical. Cutting all mortises at once, for instance, maintains your setup and mental calibration for that specific task. Switching between operations repeatedly wastes time in setup and increases the chance of mistakes from incomplete mental transitions.
Establish stopping points that leave you prepared for the next session. Completing a logical phase of work, cleaning your bench, and setting out tools for tomorrow’s first task creates momentum that makes resuming work easier.
Document your process as you work. Note dimensions, procedures that worked well, and problems encountered. This running record becomes invaluable when building additional pieces or solving similar problems in future projects.
The Journey Continues
Creating fine furniture remains a lifetime pursuit. Each project teaches lessons that inform the next, and masters continue learning throughout their careers. Embrace this ongoing development rather than expecting immediate perfection.
Study work by accomplished makers, both historical and contemporary. Visit museums with significant furniture collections. Examine how joints are cut, how proportions relate, and how details contribute to overall effect. This visual library expands your design vocabulary and inspires your own work.
Build relationships with other serious woodworkers. Sharing knowledge, critiquing work, and discussing challenges accelerates learning and maintains enthusiasm through difficult projects. The woodworking community includes remarkably generous people eager to help others advance.
Most importantly, keep building. Theory and study inform practice, but skill develops only through hours at the bench. Each piece you complete, regardless of how it compares to your aspirations, teaches lessons no book or video can provide. Trust the process, embrace the learning, and watch your furniture improve with each completed project.