Loose Furniture Joints You Can Fix Without Disassembly
Wobbly furniture has gotten complicated with all the conflicting repair advice flying around. Full disassembly this, clamp and re-glue that. As someone who spent three weeks staring at a dining chair that rocked every time a guest shifted their weight, I learned everything there is to know about fixing joints without tearing furniture apart. Today, I will share it all with you.
The standard advice you’ll find everywhere goes like this: pull it apart, scrape out the old glue, reassemble. Sure, that works. But it’s not the only answer — and honestly, it’s rarely the fastest one. Furniture makers have been fixing loose joints in place for centuries. Most repair guides just don’t bother telling you that.
How to Tell How Bad the Joint Failure Actually Is
Before you inject anything, clamp anything, or reach for your drill — stop. You need to know what you’re dealing with first. The gap between a joint that’s lost 30% of its grip and one that’s fully compromised determines everything.
Start with the wiggle test. Grab the loose arm or leg and move it side to side, then up and down. A quarter-inch of play? Half-inch? A full inch? A quarter-inch wiggle in a chair leg usually means the glue failed but the mechanical fit is still snug. Full inch of movement is a different story — the wood may have shrunk, or you’ve lost compression entirely.
Get a flashlight and inspect the joint from several angles. A dark line running along where two pieces meet means glue failure, no question. That’s the signal that thin adhesives will actually work here. If the joint looks tight to the eye but still moves when stressed, you’re dealing with glue failure alone — the pieces are still pressed together, just not bonded.
Probably should have opened with this section, honestly. But here’s the part nobody wants to hear: more than half an inch of play, movement in multiple directions, wood fibers splintering at the joint — you’re past in-place repair. Those joints need to come apart. Accepting that early saves hours of frustration.
Minor Looseness — Consolidants and Thin Adhesives
This is the sweet spot. The joint still has mechanical friction — pieces aren’t rattling loose — but the glue has given up. You’re not reassembling anything. You’re reinforcing what’s already holding.
Cyanoacrylate adhesive — CA glue, super glue, whatever you call it — works by wicking into hairline gaps. A thin-formula CA in a squeeze bottle runs about $6–8 at any hardware store. Apply it to one surface, press the pieces together, hold for 60 seconds. Thin formula only — gel won’t penetrate. That’s the part most people get wrong.
Don’t over-clamp. Seriously. Tighten a clamp too hard, you close the gap completely, and the CA has nowhere to go. Hand pressure for about a minute, then release. The joint is usable within a couple hours, though full cure takes 24. Don’t make my mistake — I once wrenched a bar clamp so tight I squeezed every drop of adhesive out of the joint and had to start over.
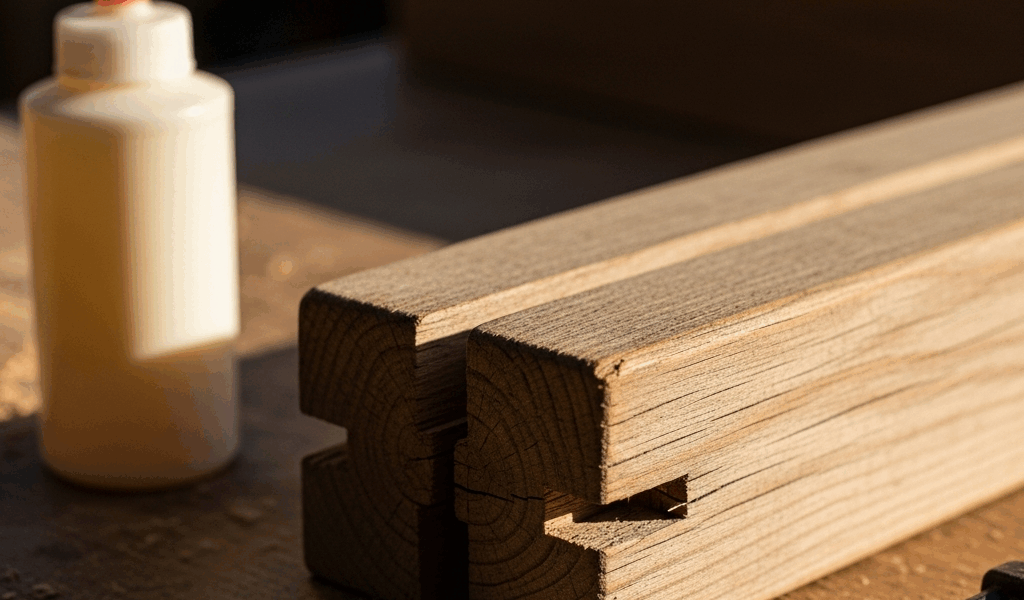
For joints you can reach with a syringe — chair rungs, table aprons, anywhere a needle fits — hide glue beats CA. Old Brown Glue runs about $12 a bottle and actually bonds to old glue residue better than modern adhesives do. Inject it into the gap, apply light clamp pressure, let it cure 12 hours. Slower, yes. Worth it on anything you’d call an heirloom.
Two-part epoxy consolidants work well for joints that have lost some compression but still grip. Bondo Wood Epoxy is widely available — around $8–10 — mixed thin, almost watery, it penetrates and hardens in place. Working time is about 5–10 minutes before it starts setting. That’s not a long window, so have everything ready before you mix.
One clear stopping point: if you release pressure and the pieces immediately separate, you don’t have enough friction fit left. Thin adhesives alone won’t save it. You’ve moved into different territory.
Moderate Looseness — Shims, Wedges, and Sawdust Tricks
Real play in the joint — pieces moving noticeably after you release pressure — means thin adhesives won’t hold on their own. You need to take up space and rebuild compression.
The toothpick method works surprisingly well for dowel joints. A 3/8-inch dowel that’s shrunk slightly leaves gaps running around it evenly. Break wooden toothpicks into roughly 1-inch segments, coat them with thin CA, tap them gently into the gaps around the dowel. Let them set completely, then sand flush. That’s real mechanical support, not just glue hoping for the best.
For mortise and tenon joints with shoulder gaps, hardwood shims are the answer. Cut thin shims from stock that matches the original species — white oak for oak furniture, walnut for walnut. Grain running lengthwise along the joint, not across it. A shim that’s 1/16 of an inch thick and about an inch long costs maybe $1–2 in material. Tap it in, apply thin CA or epoxy, let it set, sand the excess flush. That’s it.
The sawdust trick deserves a mention — but I’ll be straight about what it actually does. Mix fine sawdust from your sander with CA to make a rough putty, then pack it into gaps. It matches wood color well. What it doesn’t do is create mechanical strength. That’s what makes it useful to us woodworkers for cosmetic gaps on joints that are already tight — not for anything load-bearing.
Significant Looseness — When You Need Mechanical Help
At this point, you’re adding hardware or re-drilling. Neither is a compromise. Furniture makers use both methods constantly — production shops especially.
Corner blocks and figure-8 fasteners run about $3–6 each and are completely legitimate repair solutions. A figure-8 fastener mounted on the underside of a chair seat, right where the back meets the seat frame, stops a rocking-loose back joint dead. It allows for seasonal wood movement but kills the kind of play that destroys joinery over time. Drill two pilot holes, drive two screws, done.
I’m apparently a figure-8 fastener evangelist and that solution works for me while structural epoxy alone never does on high-stress chair joints. I’ve come around to accepting that hardware isn’t cheating.
If you need to reinforce a failing dowel joint, you can drill out the old dowel and install a larger one — 1/2-inch instead of 3/8-inch — without removing the joint. Drill carefully, coat a new hardwood dowel with epoxy, drive it home. Works best when you have space to clamp while it sets. That’s the condition that matters most.
For mortise and tenon joints that are beyond in-place saving, there’s one more option: sleeve the mortise. Drill out the old mortise to 1 inch, install a 1-inch hardwood plug with epoxy, let it cure fully, then drill a new 3/8-inch mortise into the center of the plug. You’ve created a new joint inside the old space. It’s real work — but it beats disassembly on a piece you don’t want to risk.
But what is the honest limit of in-place repair? In essence, it’s the point where wobble goes in multiple directions simultaneously. But it’s much more than that — it’s also about whether you can create enough compression to make adhesive cure properly. If you can’t hold the joint still, the repair won’t hold either. Pull it apart.
Keeping Repaired Joints From Failing Again
Loose joints fail for three reasons: wood movement, adhesive degradation, underbuilt joinery. You can’t fix the third one without rebuilding. The first two are manageable.
Control humidity. Wood expands and contracts with moisture changes — that cycling is what kills joints over years. A piece staying between 40% and 55% relative humidity stays stable. In winter, when heating systems pull moisture out of indoor air, a humidifier in the $30–50 range keeps joints from working themselves loose. A $15 hygrometer tells you where you actually stand.
Check joints annually on anything you use hard. A five-minute wiggle test on every joint catches problems before they turn into wobbles that wake you up at dinner. That habit alone prevents most serious failures before they start.
Use hide glue or epoxy on high-stress joints instead of PVA — Elmer’s Carpenter’s Glue, regular wood glue, whatever’s in the yellow bottle. PVA creeps under load over time. Hide glue and epoxy age better and hold longer. If you repair the same joint twice in ten years, the original glue choice was wrong. That’s the test.
So, without further ado — well, you’ve already done it. A loose joint doesn’t demand disassembly. It demands honest assessment, the right method for the actual severity, and knowing when to stop before you cause more damage. That’s how furniture gets fixed without coming apart.


Stay in the loop
Get the latest artisan furniture makers updates delivered to your inbox.