Wood Glue vs Epoxy for Woodworking — When to Use Each
Wood glue vs epoxy has turned into a moving target with all the forum arguments and YouTube comment wars flying around. Most answers you’ll find are frustratingly vague — “it depends” gets thrown out constantly, which is technically true and completely useless when you’re standing at your bench with a joint that needs to close in the next twenty minutes before your clamps are tied up all afternoon. As someone who’s been building furniture for about twelve years — custom pieces, production runs, repairs on antiques that shouldn’t be touched with anything aggressive — I figured out how to handle when each adhesive actually earns its place. Not opinions. Rules, based on what holds and what eventually fails.
The short version: PVA is your default. Epoxy is your specialist. Using epoxy where wood glue belongs is like using a scalpel to chop vegetables — it’ll work, technically, but you’re making your life harder for no reason.
PVA Wood Glue Wins on Tight Joints
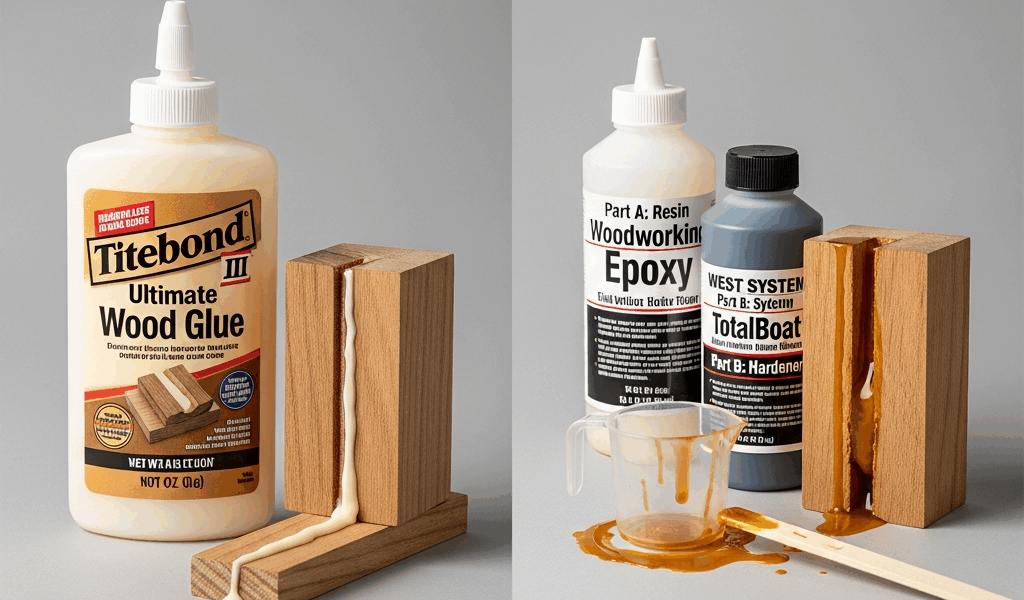
Titebond III is sitting on my bench right now. Has been sitting there, in some form, since I started making furniture. The squeeze bottle gets refilled from a gallon jug I pick up at Woodcraft for around $28 — that jug lasts me a solid two months of regular production. That bottle has closed more joints than I can count, and here’s what most woodworkers don’t say plainly enough: on a properly fitted wood-to-wood joint, Titebond III creates a bond stronger than the wood surrounding it.
Not marketing language. That’s just the chemistry working. Glue up a well-fitted mortise and tenon — or a flat edge joint on tabletop panels — break that joint later, and the wood fails before the glue line does. The fiber tears apart on either side while the thin line of cured PVA sits there intact. I’ve done this deliberately with test pieces. Consistently true on tight-fitting joints with good surface contact.
What “Tight” Actually Means
But what is a tight joint, exactly? In essence, it’s a gap under 0.005 inches — roughly the thickness of a piece of printer paper. But it’s much more than that in practice. Slide a dollar bill into your joint and feel resistance? Marginal, but workable. Bill slides freely? You’re entering gap territory, and PVA is going to let you down — not immediately, but under load over time.
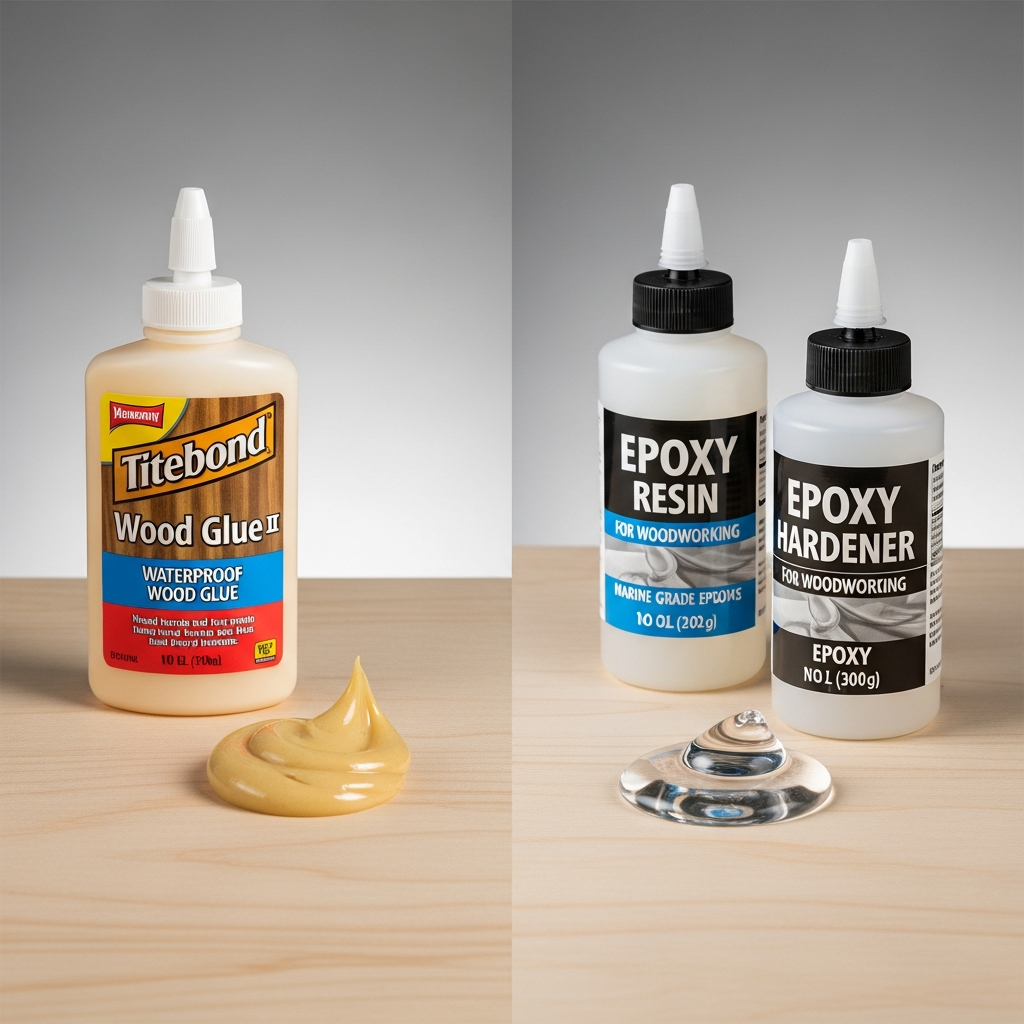
PVA glues are water-based polymer emulsions. The water migrates into wood fibers, the polymer chains cure, and you get that mechanical bond — genuinely impressive stuff. That same water-based formula, though, means PVA has almost no gap-filling capability. In a gap, there isn’t enough surface contact for the polymer to grip. What you get instead is what woodworkers call a “starved joint” — brittle, chalky, destined to open up.
The Creep Issue — and Why It Matters for Furniture
One thing that doesn’t get discussed enough is creep. Slow deformation under sustained load. Some glues creep significantly — original Elmer’s white glue, for instance, will let a loaded joint slowly shift over months. Titebond III has excellent creep resistance, which matters enormously on chair joints and table stretchers living under constant tension. A chair leg under daily load needs a glue that doesn’t slowly relax. Titebond III stays put. That’s what makes it endearing to us furniture makers.
Sandability is another practical point worth mentioning. PVA sands cleanly — doesn’t gum up your sandpaper the way cured epoxy does, doesn’t create hard inclusions that scratch wood surfaces around a joint line. Squeeze-out is easy to deal with too. Wipe it wet with a damp cloth, or let it fully cure and pare it off with a chisel. I prefer the chisel method, honestly — wet cleanup can raise grain on adjacent surfaces. Steer clear of where I went wrong there.
Open Time and Working Conditions
Titebond III gives you about eight to ten minutes of open time at 70°F — enough for most glue-ups if your clamps are staged and surfaces prepped. Cold weather is a different story. Below 55°F, PVA gets sluggish and can fail to cure properly. I ruined a walnut panel glue-up that way in an unheated shop one January, clamps staged perfectly, surfaces fitted beautifully, joint failed anyway because the temperature had dropped overnight. Never again. The minimum application temperature for Titebond III is technically 47°F — I’d push that to 55°F as a practical working minimum.
Epoxy Wins on Gaps and Mixed Materials
Worth putting near the top, because gap-filling is the single capability that makes epoxy irreplaceable. When your joint isn’t tight — machining error, a repair situation, geometry that just won’t cooperate — epoxy is the only structural-grade option that fills that gap and holds.
I keep two epoxy systems in my shop. West System 105 resin with 205 hardener is my standard structural epoxy — a quart of resin runs around $45, hardener another $20. For thicker fills and voids, I use System Three SilverTip Gel Magic — thicker viscosity, doesn’t run out of a vertical gap before it cures. Different jobs. Different viscosities. Both earn their shelf space.
The Gap-Filling Mechanism
Epoxy is a two-part system — resin and hardener combine in a chemical reaction that produces a cured thermoset polymer. No solvent evaporating, no water migrating anywhere. The material fills a space, stays there, hardens in place. A 3mm gap gets filled with something that’s actually structurally present, creating real surface contact across the joint.
Frustrated by a split in an antique dresser leg — a 4mm crack running halfway up a turned maple leg — I once repaired it using thinned West System epoxy wicked in with a syringe, followed by a thickened fill of the same system mixed with colloidal silica. Four years in service now. That crack is not coming back.
The catch — and it’s real — is that on tight wood-to-wood joints, epoxy is actually the weaker choice. Cured epoxy is rigid and somewhat brittle compared to wood fibers around it. On a tight joint, the mechanical interlock that PVA creates with wood cells is genuinely superior. Use epoxy in gaps where it belongs, not as a stronger-seeming substitute for proper fitting. Those are different jobs.
Wood-to-Metal and Wood-to-Glass
PVA is useless on non-porous materials. Full stop. It needs to penetrate wood fibers — metal, glass, ceramic, stone won’t cooperate. Epoxy will. This comes up in furniture making more than you’d expect: attaching metal legs to wood tops, installing glass panels into frames with minimal mechanical retention, embedding threaded inserts. These are epoxy jobs. Bond strength on a properly prepared metal-to-wood joint with West System is excellent — well above what most furniture applications will ever demand.
Surface prep matters enormously with epoxy on non-porous materials. Metal needs to be sanded with 80-grit and cleaned with acetone immediately before bonding — I mean immediately, within a few minutes, before oxidation begins. Skip that step and the bond is compromised before you’ve started.
The Decision Rule
Here’s the framework I actually use. No lengthy deliberation at the bench required.
- Tight joint, wood to wood — Titebond III. Every time. Faster to apply, easier to clean up, stronger at the joint line, costs a fraction of epoxy per application.
- Gap present, joint under structural load — Epoxy, full stop. Match viscosity to gap size: thin-penetrating for hairline cracks, gel or thickened for gaps above 1mm.
- Wood to non-porous material — Epoxy. PVA isn’t a candidate here regardless of fit quality.
- Outdoor exposure, water contact — Titebond III is waterproof — passed the ANSI/HPVA Type I water resistance test — and handles outdoor furniture fine. For full marine immersion or structural boat work, marine-grade epoxy like West System or MAS Epoxies is the right call.
- Repair work on unknown or contaminated wood — Epoxy. Old furniture may have oil, wax, or finish contamination near the joint surface. Epoxy is more tolerant of that than PVA — not immune, but more forgiving.
Mixing and Pot Life — The Practical Constraints
One reason people default to PVA even when epoxy might be correct is the friction of the two-part mixing process. That friction is real. Titebond III goes from bottle to surface in about fifteen seconds. Epoxy requires measuring by volume or weight — West System uses a pump system, one pump resin to one pump hardener for the 205 hardener — then mixing thoroughly for a full ninety seconds, then working within the pot life before viscosity climbs.
West System 105/205 has a working time of about nine to twelve minutes at 72°F. Sounds similar to PVA’s open time, but epoxy viscosity increases as the reaction progresses — you’re fighting the clock differently. Cold conditions actually help here. A shop at 60°F can give you fifteen to eighteen minutes of working time, useful for complex glue-ups. Heat kills you. At 90°F, pot life drops to five minutes — I’ve had cups of mixed epoxy turn hot and gel before I could use them. Lost a cup of West System on a humid August afternoon in my shop, clamps already staged, wood already coated. Not a good moment.
Cost Per Joint
A typical edge joint glue-up on a 6-foot tabletop uses maybe 15ml of Titebond III. At $28 per gallon — roughly 3,785ml — that’s about $0.11 per joint. The same joint with West System would use around 30ml of mixed material, costing approximately $0.85 to $1.20 depending on current prices. Not meaningful on one joint. But a production run of thirty chairs? That adds up fast, and there’s no performance reason to use epoxy on tight mortise and tenon joints — PVA is better for that application and cheaper. Both things at once.
The woodworking forums treat this like a philosophical debate. It’s not. These are tools with defined performance characteristics — PVA excels at tight wood-to-wood bonds with good sandability and easy cleanup, epoxy excels at gap-filling, mixed material bonding, and tolerance of surface imperfection. Internalize those two sentences and the right adhesive for any situation becomes obvious before you even pick up the bottle.

Stay in the loop
Get the latest artisan furniture makers updates delivered to your inbox.