What You’re Actually Deciding Between
Joinery debates have gotten complicated with all the forum noise and YouTube opinions flying around. As someone who’s spent years repairing furniture that other people built — and plenty that I built wrong the first time — I learned everything there is to know about when these joints succeed and when they don’t. Today, I will share it all with you.
The mortise and tenon vs dowel decision really comes down to three things: how much stress the joint will carry, what tools you already own, and how much time you have per joint. Not aesthetics. Not tradition. Those are the actual factors that determine whether your chair wobbles in three years or lasts thirty.
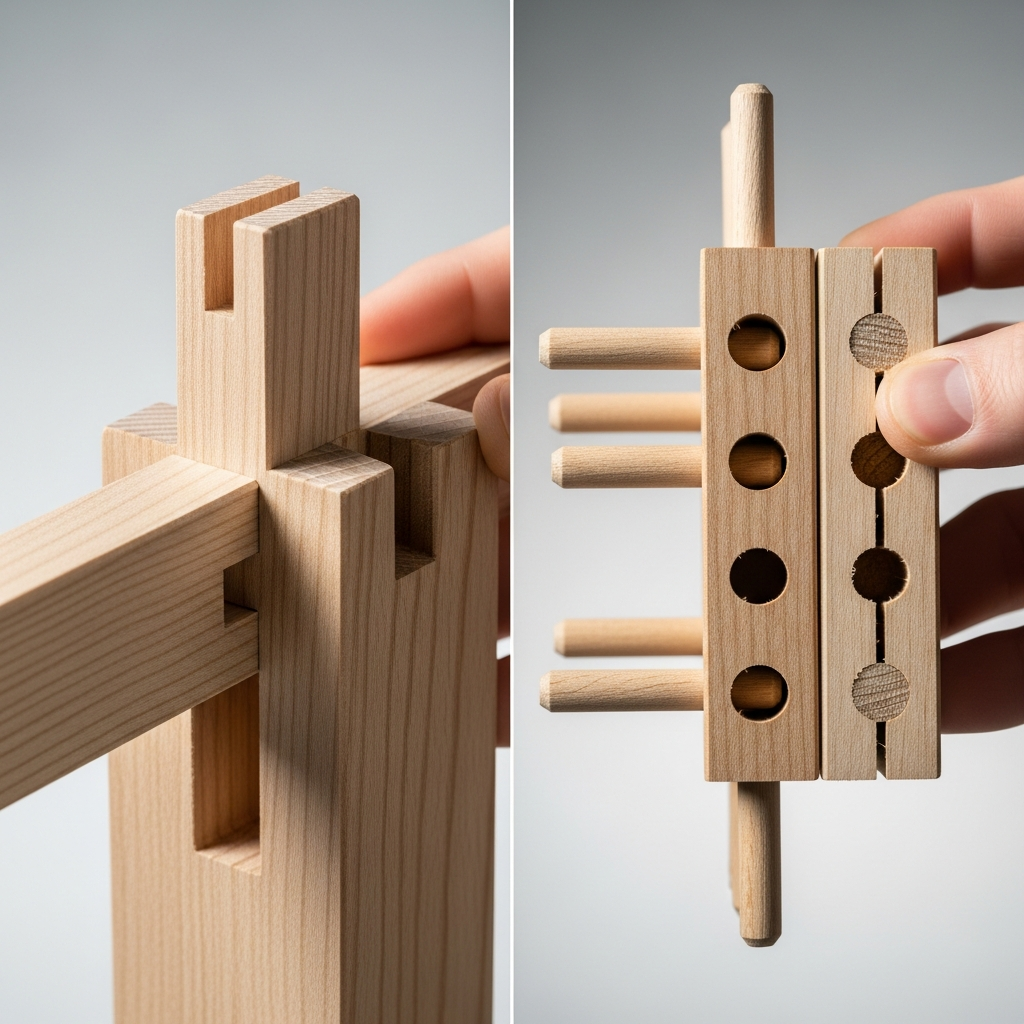
But what is a mortise and tenon joint? In essence, it’s a rectangular tongue — the tenon — cut into one piece that fits into a matching slot cut into another. But it’s much more than that. A dowel joint, by contrast, uses cylindrical wooden pegs inserted into aligned holes drilled in both mating pieces. That’s the whole mechanical difference between them. Everything else flows from that geometry.
So, without further ado, let’s dive in.
Strength and Failure Points Side by Side
Probably should have opened with this section, honestly. Most comparison articles say “mortise and tenon is stronger” and just move on — which tells you almost nothing without context on failure modes and load direction.
Racking Resistance
Racking is lateral stress. The force trying to push a joint sideways rather than pulling it apart or crushing it straight down. Chair legs experience massive racking stress every time someone leans back. Dining table aprons get it when the table drags across a floor. This is where mortise and tenon joints earn their reputation — and where dowels quietly fall apart over time.
A well-cut mortise and tenon brings two mechanical advantages to the fight. The shoulder of the tenon bears against the mortised piece and resists rotation. The long-grain glue surfaces on both tenon faces are substantial — often 2 to 3 square inches or more depending on joint size. That shoulder contact is the part that matters most under racking. It’s a physical stop, not just adhesive holding things together through optimism.
A dowel joint has neither of those things. Two 3/8-inch dowels in a chair leg-to-apron connection give you maybe 1.4 square inches of long-grain glue surface total — and zero shoulder bearing. The joint resists racking entirely through glue and dowel shear strength. Fine for low-stress applications. Not fine for a chair. That’s what makes the shoulder distinction so endearing to us woodworkers who’ve seen both joint types fail in the real world.
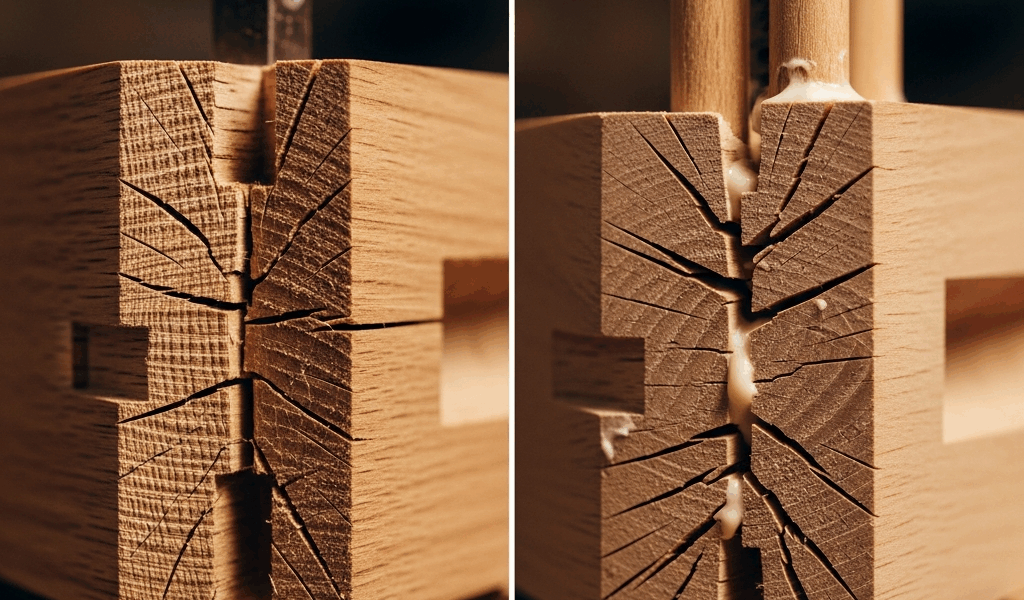
Real Failure Modes
Dowels fail in two ways I’ve seen repeatedly. First is spinning during assembly — the dowel rotates in the hole instead of seating, usually when the fit runs slightly loose or glue pools at the bottom of the hole. The joint assembles looking perfect and falls apart in six months. Second is shear failure under racking stress. The dowel snaps at the glue line, typically leaving one half buried in each piece. Don’t make my mistake of assuming a tight-feeling dry fit means a tight assembled joint.
Mortise and tenon joints fail differently. The most common failure I’ve seen is end-grain blowout — when the mortise gets cut too close to the end of a workpiece, the short grain between the mortise wall and the board end fractures under stress. One inch minimum of material beyond the mortise end is the standard rule, and it exists for a reason. Tenons also crack along the grain if they’re cut too thin for the species. I once cut 1/4-inch tenons in white oak for a cabinet door frame and watched two of them split during clamping. Lesson learned the hard way. Minimum 3/8 inch for hardwoods — write that somewhere you’ll actually see it.
Glue Surface Comparison
Long-grain to long-grain glue bonds are strong. End-grain bonds are weak — genuinely, structurally weak, not just slightly inferior. Dowels going into end grain, like a rail into the end of a stile, rely on a fundamentally poor glue surface. A mortise and tenon in that same situation keeps the primary glue contact on the long-grain faces of the tenon. That’s why it outperforms every single time in that application, not occasionally, every time.
Tool Requirements and Time Cost Per Joint
Cutting mortise and tenon joints by hand — mallet, chisels, tenon saw — takes me about 25 to 35 minutes per joint when I’m not rushing. That includes layout, chopping, and fitting. With a dedicated hollow chisel mortiser (I’m apparently a Powermatic person, and the PM701 at around $700 new works for me while cheaper benchtop models never gave me the repeatability I needed) and a table saw tenon jig, I can knock that down to 8 to 12 minutes per joint including setup and test cuts.
A plunge router with an Infinity Tools mortising jig falls somewhere in the middle. Faster than hand tools, more setup time than a dedicated mortiser — around 15 minutes per joint once you’re dialed in. That might be the best option for occasional work, as mortise and tenon joinery requires consistent depth and wall flatness. That is because an inconsistent mortise means a sloppy shoulder fit, and a sloppy shoulder fit defeats the whole mechanical advantage you’re building toward.
While you won’t need a full commercial shop setup, you will need a handful of reliable tools to do this work repeatably. Dowel joints are faster per joint but carry their own time cost buried in alignment. A self-centering doweling jig like the Milescraft 1325 — $35 to $40 at most woodworking retailers — makes alignment reliable and brings time per joint down to around 5 to 8 minutes including drilling and dry fit. Manual dowel centers are cheap and slower, maybe 10 to 15 minutes per joint once you factor in the test fitting you’ll inevitably do.
A misaligned dowel joint in a face frame is genuinely difficult to fix without breaking glue lines. I’ve done it. It is not a small problem. First, you should use a self-centering jig — at least if you want to avoid spending an afternoon with a chisel trying to free a face frame that assembled crooked by 3/32 of an inch.
Which Joint Wins for Each Project Type
Dining table aprons — Mortise and tenon. The apron-to-leg connection takes constant racking stress. No dowel setup adequately replaces that shoulder bearing — not with better glue, not with more dowels.
Chair legs and rails — Mortise and tenon, no question. Chairs are the hardest-working joints in furniture. Drawbored mortise and tenon if you want to skip clamps entirely and get a mechanically locked joint.
Cabinet carcasses — Dowels work well here. A cabinet box doesn’t experience the racking stress a chair does. Alignment matters more than raw strength in this context, and the time savings across 20 or 30 joints adds up fast. Pocket screws also compete here, but dowels give you a cleaner glue surface without visible hardware.
Bed frames — Mortise and tenon for the rail-to-post connection, typically paired with a bed bolt for knockdown capability. Dowels won’t hold up to the leverage a mattress and occupant put on a side rail over years of use.
Face frames — Dowels, specifically with a self-centering jig. Face frame joints don’t carry structural load the same way. A tight dowel joint here is fast, accurate, and completely appropriate for the application.
The Honest Bottom Line
Frustrated by years of seeing this framed as some beginner’s philosophical question, I started tracking which joint actually failed on the furniture repairs coming through my shop. Chairs and tables — mortise and tenon failures were almost always bad wood or a miscut joint. Dowel failures were almost always a stress mismatch. Someone used dowels where the joint genuinely needed shoulders. That was the story, again and again.
Dowels are not inferior joints. They are the right joint in the right context. Building cabinet boxes, face frames, low-stress drawer components — dowels save you real time and the results hold. Building seating or anything carrying lateral racking loads — you need mortise and tenon. That’s what makes the load question so central to us woodworkers trying to build things that outlast us.
The real decision comes down to your shop setup. No dedicated mortiser, no router jig — cutting mortise and tenon joints by hand on a 20-joint project is a significant time investment. Knowing which projects genuinely require the stronger joint, and using dowels where they’re appropriate, is smarter than defaulting to one method across everything you build.
Build for the load the joint will actually carry. That’s the whole answer.


Stay in the loop
Get the latest artisan furniture makers updates delivered to your inbox.