Why Pine Absorbs Stain So Unevenly
Staining pine has grown more complex with the conflicting advice flying around. Sand this grit, skip that step, use conditioner, don’t use conditioner — everyone has an opinion. As someone who destroyed a pine bookshelf I’d spent three weekends building, I sat down and learned why pine stain goes wrong. Today, I will share it all with you.
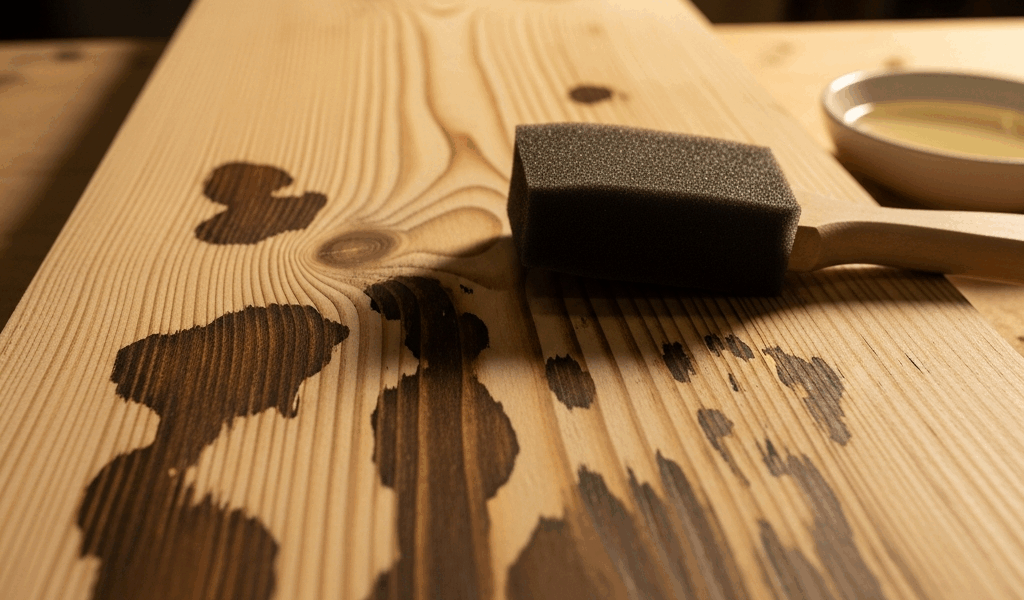
But what is pine’s blotching problem, exactly? In essence, it’s a porosity mismatch baked into the wood itself. But it’s much more than that. Pine is a softwood — unlike oak or maple, which carry a dense, relatively uniform grain structure, pine has a split personality at the microscopic level. Each growth ring contains early wood (springwood) and late wood (summerwood). Early wood grows fast in spring and is soft, porous, almost eager for stain. Late wood forms in summer and is denser, tighter, resistant to liquid penetration. Brush stain onto pine and the early wood drinks it aggressively while the late wood shrugs it off. You don’t need a microscope to see the result. Just catch it under raking light — the banding becomes obvious, almost offensive.
Resin pockets complicate things further. Pine naturally holds pockets of resin sitting between grain fibers — tiny dams, essentially. Stain flows around them or pools against them, creating darker spots or lighter halos depending on how the board was milled and which direction you’re looking from.
There’s one more culprit most people never consider: mill glaze. When pine lumber gets planed at the mill, the planer blades compress and burnish the wood fibers on the surface. That sealed, compressed layer is uneven — some areas hit harder than others depending on blade angle, feed rate, moisture content in the wood. Those burnished spots absorb stain differently than fresh, opened grain. You end up with patches that just won’t take color, no matter how long the stain sits. That’s what makes pine so maddening to us woodworkers who actually care about a clean finish.
Sanding Mistakes That Make Blotching Worse
Quick callout up front. Most of my early staining disasters weren’t about stain at all. They were about sandpaper.
I’d sand with 120 grit, maybe 150, then jump straight to staining. Thought I was saving time. I was guaranteeing failure. Here’s the mechanical reality: sanding pine with only coarse grits — 80 to 120 — tears open the grain and creates a surface that’s gouged and inconsistent. Some fibers stand proud; others get crushed. Stain pools in the gouges and skips the crushed areas. Uneven absorption is baked in before the brush touches wood.
Going the opposite direction is equally destructive. Sanding above 180 grit — especially 220 or 320 — closes and burnishes the pores on pine. You’re essentially recreating that mill glaze yourself. The surface goes slick and resistant. Stain can’t penetrate evenly because penetration gets blocked in patches. Don’t do it.
Using a random orbital sander without hand-sanding between grits is another trap. Random orbitals leave a scratched surface, and if you don’t follow up with hand-sanding along the grain at 150 or 180 grit, those scratches run in conflicting directions. Stain absorption follows the scratches — you get a crosshatched, blotchy mess that looks almost deliberate.
My worst mistake: I started with 80 grit along the grain, then switched to a random orbital at 120 because my arm was tired. I’m apparently impatient like that, and my Ridgid ROS2400 works great for bulk material removal while hand-sanding never feels fast enough for me. The orbital’s swirling scratches dominated the entire surface texture. The stain went down and highlighted every arc and loop. It looked intentional — which was somehow worse. Spare yourself the wrong turn I took.
How to Use a Pre-Stain Wood Conditioner Correctly
This is probably the most misunderstood step in finishing pine. So, without further ado, let’s dive in.
Pre-stain conditioner does one thing: it partially fills the wood’s pores with a very thin layer of resin or gelling agent. Not a complete seal — just enough to even out the absorption rate. The hungry early wood and the stubborn late wood end up accepting stain at roughly the same speed. Absorption becomes uniform rather than frantic and lopsided. That’s what makes pre-conditioner so endearing to us pine finishers.
The problem is application. Most people — I did this at least three times before it clicked — apply conditioner too thickly, let it dry completely, then stain the next day. That defeats the entire purpose. A thick, dried conditioner layer actually seals grain and causes uneven stain absorption all over again. You’ve just created a different problem.
Here’s the correct sequence: apply pre-conditioner with a brush or cloth, using just enough to wet the surface evenly. Minwax Pre-Stain Wood Conditioner runs about $10 to $14 per quart at most hardware stores — it’s what I reach for. Wait 5 to 15 minutes, depending on the manufacturer’s recommended window on the can. The surface should feel slightly tacky. Not wet. Not dry. Wipe off the excess with a clean cloth, leaving a thin, even residue on the wood. Now stain immediately — or within 30 minutes while that light conditioner layer is still active.
One honest caveat: pre-conditioner reduces color depth. A stain that would hit deep walnut brown on raw pine will land more like a medium brown on conditioned pine. Accept a lighter final color or bump up to a darker stain shade — and test it on scrap first. I learned this by ruining a pine bookcase before testing on anything. Don’t do that.
Fixing Blotchy Stain After It Has Already Dried
Frustrated by uneven stain already locked into your pine project, you’ve probably started searching for miracle fixes. There are realistic options — none are quite as good as getting it right initially, but here’s what actually works.
Option one: sand back and start over. The nuclear solution. Depending on how deep the stain penetrated, you might need to work through 100, 120, 150, and 180 grit — sometimes 220 to get clean wood. Tedious. It’ll cost a full day, maybe two. But it works. You get a fresh surface and a second chance to apply conditioner and stain correctly.
Option two: apply a tinted topcoat to blend the tones. If the blotching isn’t severe, a semi-transparent tinted polyurethane in a matching hue can visually even out the variation. You lose some of the wood’s raw look — it gets more formal, more finished — but it’s significantly faster than sanding back. Works best on pieces where a slightly dressed-up appearance is acceptable.
Option three: apply gel stain over the dried liquid stain. Gel stain is thicker and sits on the surface rather than penetrating. Applied carefully, it can mask underlying blotches and deliver a more uniform appearance. The tradeoff is a slightly plastic quality rather than that natural penetrated look. A compromise, not a perfect fix — but faster than sanding everything back to bare wood.
When to Choose Gel Stain Instead of Liquid Stain on Pine
Gel stain isn’t a shortcut for beginners. It’s a different tool for a specific job.
Gel stain stays on the surface. It doesn’t fight pine’s porosity because it isn’t trying to penetrate unevenly in the first place. Color sits uniformly on top of the wood — blotching gets eliminated at the source rather than managed after the fact. For pine boards with wildly variable grain or resin content, which is most pine honestly, gel stain delivers consistent results where liquid stain struggles.
The drawbacks are real though. Gel stain looks less like natural wood. It carries a slightly thicker, more painted quality. Color depth is shallower than liquid stain. Application is slower — you’re essentially painting rather than staining, which means brush strokes and technique matter more. While you won’t need a spray rig or professional setup, you will need a handful of quality foam brushes and genuine patience with the wipe-off process. First, you should work in small sections — at least if you want to avoid the gel drying before you wipe it back.
Gel stain might be the best option, as pine finishing requires surface-level color control. That is because the wood’s porous inconsistency makes penetrating stains inherently risky on uncontrolled grain. Minwax Gel Stain and Varathane both make solid versions — around $8 to $12 per quart at Home Depot or Lowe’s. Both perform well. I’m apparently a Minwax person and it works for me while Varathane never seems to wipe off as cleanly for some reason.
Pine doesn’t have to look like a topographic map of bad decisions when stained. It just requires understanding why it absorbs unevenly — and taking the steps to manage that reality before it ruins your project. Conditioner, proper sanding, patience. That’s the whole secret.


Stay in the loop
Get the latest artisan furniture makers updates delivered to your inbox.