When Glue Joints Fail Hours or Days After Clamping
I spent six hours building a walnut bookcase last fall. The joints looked perfect when I unwrapped the clamps. No gaps. Clean glue lines. I left it overnight, feeling satisfied.
Three days later, I moved the bookcase across my workshop. One shelf bracket cracked clean away from the side rail.
The joint had failed silently, completely, and it took me hours of inspection to understand why. The problem wasn’t my technique during assembly—it was what happened after the clamps came off. That’s when everything changed.
If you’ve experienced this, you’re not alone. Joint failure after clamping happens regularly in home shops and commercial operations, and the causes are rarely obvious. The glue looked wet. The surfaces felt tight. Then something gave. It’s one of those woodworking problems that’ll drive you absolutely crazy until you figure out what’s going on.
This gap in troubleshooting content exists because most articles focus on initial assembly or visible problems like gaps and squeaks. But post-clamp joint failure is its own beast entirely — it’s about glue starvation, adhesive incompatibility, improper curing conditions, and structural stress patterns that only reveal themselves under load. Without further ado, let me walk you through the main failure modes so you can diagnose what happened to your joints:
- Starved joints — too much clamp pressure forced the adhesive completely out
- Adhesive incompatibility — wrong glue for the wood species or surface condition
- Inadequate cure — temperature or humidity prevented the glue from hardening properly
- Incompatible surface prep — oils, finishes, or dust blocked adhesive penetration
- Stress concentration — joints failed under normal use because the glue line was marginal
Starved Joints and Squeeze-Out Gone Wrong
Over-clamping is the first thing I check when a joint fails. Sounds counterintuitive, right? More pressure should mean stronger joints. Actually, it destroys them.
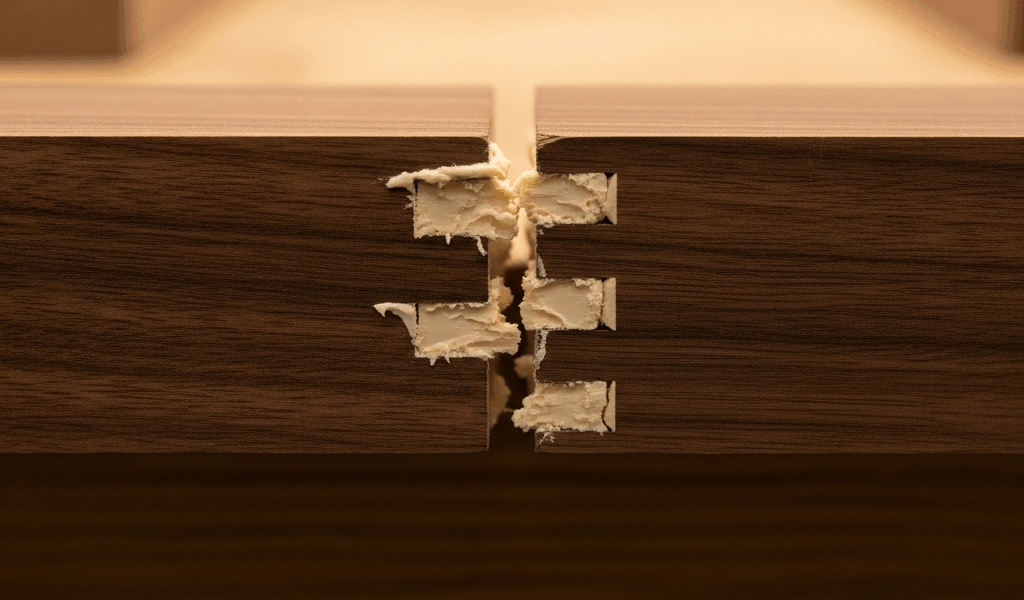
When you over-clamp, you force virtually all the adhesive out of the joint. PVA glues like Titebond need adhesive material to remain in the gap — that’s where the strength comes from. Squeeze out 95% of the glue and you’ve created what woodworkers call a “starved joint.” Mechanically locked wood-to-wood contact with minimal bonding layer. That’s it. That’s the problem.
Here’s what it looks like: when you unwrap the clamps, the joint line appears bone-dry. There’s almost no glue residue on the wood. The surfaces feel almost like they’re touching directly. This isn’t a sign of a tight joint. It’s a warning sign.
Frustrated by that walnut bookcase failure, I disassembled the shelf bracket — a mortise-and-tenon joint — and found zero glue squeeze-out. I’d actually taken this as a sign of perfect technique. It wasn’t. Under the weight of books, the joint simply parted because there was nothing holding it together except the mechanical fit of the wood itself. Don’t make my mistake.
To test your clamping pressure, use this method: apply glue to a test piece with identical grain and species to your project. Clamp it using your exact clamping technique and pressure. Then cross-section it after the glue cures. A healthy joint shows a visible glue line — usually 0.5 to 2mm thick depending on wood porosity — with color visible across the entire bond line. A starved joint shows a thin, almost invisible line or dry wood touching wood in spots.
Most woodworking adhesives perform best between 100-200 PSI of clamp pressure. Not as much as you think. A bar clamp with 50 pounds of hand pressure applied to the handle typically delivers 100-150 PSI depending on the clamp geometry. Powered clamps or over-tightened handscrews? They easily exceed 300-400 PSI and will starve the joint every time. That’s the range where everything goes wrong.
The irony is that starved joints often fail slowly. The initial failure might be micro-fractures in the glue line. Weeks or months later, during normal use, those micro-fractures propagate and the joint suddenly separates. You won’t see it coming.
Glue Type Mismatch and Species Incompatibility
Not all wood glues work equally on all woods. This seems obvious, but I’ve wasted entire projects by ignoring it.
The problem surfaces most obviously with oily species — teak, rosewood, wenge, and even new walnut with residual oil content. PVA adhesives like Titebond struggle with these woods. The oils create a water-repellent barrier. The glue sits on the surface instead of penetrating and bonding. When stress hits, the joint fails because there’s no real mechanical interlock.
Epoxy works differently. It doesn’t rely on penetration the way PVA does. Instead, it chemically hardens on the surface and creates a mechanical bond through the irregular wood grain. For oily woods, epoxy is your answer — it’ll work where PVA fails every single time.
Hide glue — the traditional furniture adhesive — performs beautifully on all wood species because it penetrates deeply even on oily woods. But hide glue has moisture sensitivity. If your joint is exposed to humidity fluctuations, hide glue can re-soften and fail. That’s a different problem entirely, but it matters for location and finish decisions.
I’m apparently the type who learns expensive lessons. Made a mistake with a teak box last year using standard Titebond II on oily teak wood without cleaning it first. The lid separated at three joints within two months of finishing. I had to rebuild the entire lid using epoxy and wood flour filler. It taught me to respect species incompatibility seriously — more than I probably should have had to.
Here’s a quick reference for common wood-glue matches:
| Wood Type | Best Glue | Why |
| Oak, maple, ash (hardwoods) | PVA (Titebond) | Penetrates well, easy cleanup |
| Walnut, cherry | PVA or hide glue | Both work; hide glue if moisture-stable environment |
| Teak, rosewood, oily exotics | Epoxy | Oil resistance, mechanical bond |
| Softwoods (pine, fir) | PVA or hide glue | Both penetrate easily |
Surface preparation before gluing matters immensely. Dust on the joint surfaces blocks adhesive penetration. Residual finish or sealer creates the same problem. I learned to vacuum joints thoroughly and wipe them with a slightly damp rag 30 minutes before gluing. That single habit eliminated failures tied to surface contamination.
Curing Temperature and Humidity Mistakes
Glue cures through evaporation and chemical cross-linking. Both processes slow dramatically when conditions are wrong.
I heat my workshop to about 65°F in winter. That’s warmer than many woodworkers maintain. But even that temperature is marginal for some adhesives. PVA adhesives cure fastest between 70-80°F. Below 65°F, cure times double or triple. At 55°F, cure is so slow that joints can appear to set while still remaining weak underneath. The glue just sits there, doing nothing.
Winter is when I see the most joint failures. A maker glues up a project in an unheated garage in December, leaves it overnight, then moves it before the glue has truly hardened. The joint holds the initial assembly stress but fails when actually used because the glue never reached full strength.
Humidity swings create different problems. PVA glues need ambient humidity around 40-60% for optimal cure. Too dry and the glue surface crusts over while the interior remains soft. Too humid and water content slows or prevents proper cross-linking.
Epoxy is more temperature-forgiving than PVA, but it’s also more humidity-sensitive. High humidity during epoxy cure can cause a cloudy, weakened glue line. I learned this the hard way in my damp workshop during spring when humidity hit 75%. Three epoxy joints from that batch developed visible cloudiness and eventually failed. Apparently my shop is at its worst in April.
The practical fix: know your workshop conditions. A cheap hygrometer and thermometer cost $12-15 at any hardware store. If you’re clamping joints, check your shop temperature and humidity. If conditions are outside manufacturer ranges, either warm the shop, seal it, or wait for better conditions. It takes discipline, but it’s faster than rebuilding joints.
Common adhesive cure conditions:
- Titebond I/II — 70-80°F, 40-60% humidity. Full strength in 24 hours at optimal temp.
- Hide glue — 65-75°F. Moisture-dependent; excess humidity delays cure.
- Epoxy (5-minute) — Room temperature. Slower in cold, faster in heat. High humidity weakens cure.
- Polyurethane (Gorilla Glue) — Room temperature. Requires 5-10% moisture in joint. Dry joints fail.
How to Diagnose and Repair Failed Joints
When a joint fails, your first instinct is probably frustration. Probably should have opened with this section, honestly — understanding why it failed prevents the next failure.
Start by disassembling the joint carefully. Use a chisel and mallet to gently separate the pieces. Look at the glue line. This tells you everything.
- If the joint line is clean and dry with no glue residue — you starved the joint. Clamping pressure was too high.
- If there’s glue residue on both surfaces evenly — likely a cure or adhesive incompatibility issue.
- If glue appears chalky or cloudy — humidity or temperature problem during cure.
- If one surface has glue and the other is bare wood — adhesive failure, suggesting surface contamination or incompatibility.
Next, inspect the wood itself. Is it splintered? Crushed? Clean? Crushed wood fiber means your original clamping pressure was actually fine — something else failed. Splintered wood suggests the joint never held properly and was stressed beyond its adhesive capacity.
Now you decide: repair or scrap. If the joint is structural and took all the failure impact, repair it. If supporting joints held and this one just failed, you might be able to continue and reinforce with a different glue or method. Be honest about the stakes. A shelf joint failure is different from a chair rail failure.
To repair, clean the joint completely. Remove all old glue — use a chisel or scraper to get down to raw wood. Then:
- Identify what caused the failure using your diagnosis above
- Select the appropriate glue (if adhesive incompatibility was the issue, switch types)
- Adjust your clamping pressure downward (unless you over-clamped)
- Control your workshop environment — warm it, dry it, or wait for better conditions
- Clamp to light-to-moderate pressure only. Aim for just enough pressure to hold parts aligned, not maximum pressure
- Allow triple the manufacturer-recommended cure time if your shop is cold or humid
Quick-reference checklist for your next glue-up:
- Wood species identified. Correct glue selected for that species.
- All joint surfaces cleaned of dust and residue.
- Workshop temperature confirmed above 65°F (70°F is safer).
- Workshop humidity measured and within 40-60% range.
- Clamp pressure set to light-to-moderate (hand-tight plus gentle tightening only).
- Cure time extended if temperatures are below 70°F.
- Project left untouched for full cure period plus 50% extra time.
Joint failures after clamping are frustrating. But they’re also teaching moments. Each failure points directly to a fixable mistake — either technique, material selection, or environment. Once you’ve experienced one and corrected it, you stop repeating it. That’s how craft knowledge actually builds.



Stay in the loop
Get the latest artisan furniture makers updates delivered to your inbox.