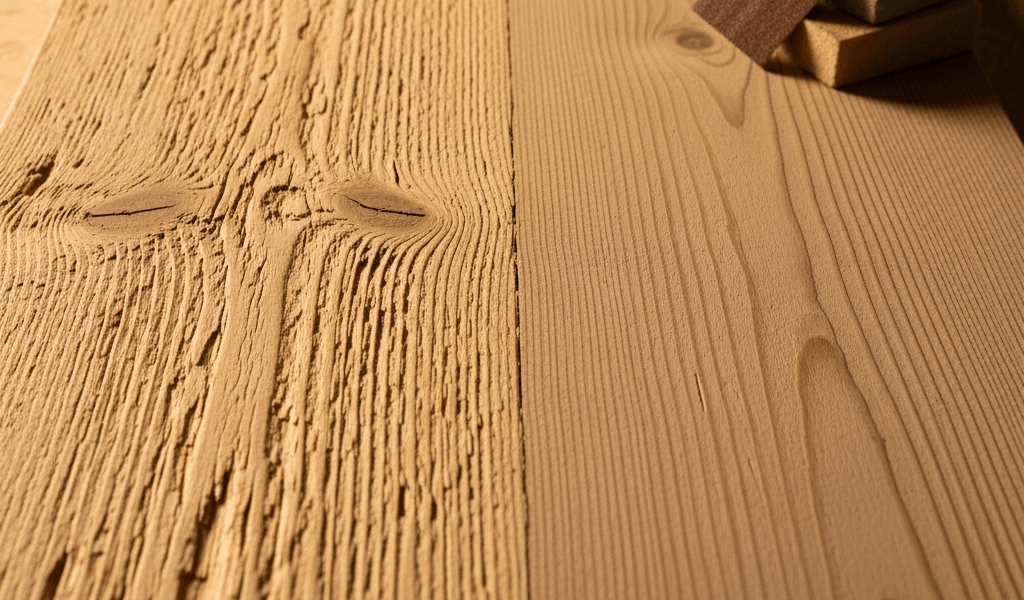
Why Softwoods Absorb Stain Unevenly
Softwood stain absorption has gotten complicated with all the misleading advice floating around. I learned everything about this the hard way during my first pine refinishing project—I’d naively assumed all wood took stain the same way.
Here’s what’s actually happening inside the wood. Softwoods like pine, fir, and spruce have completely different cellular structure than hardwoods. Think about a tree’s cross-section: the light rings are earlywood, grown fast in spring when water demand peaks. The darker rings are latewood, grown slowly in summer when the tree builds denser, thicker cell walls. In softwoods, the contrast is dramatic. Earlywood is porous—tons of open space. Latewood is tight, compact. You apply stain and earlywood drinks it immediately, turning dark. Latewood resists and stays lighter. Result: blotches.
But what is this really? In essence, it’s wood chemistry. Softwoods have larger longitudinal vessels and less lignin binding the grain together, meaning stain molecules move through them like water through sand versus clay. Grain direction matters too — wood cells elongate along the grain, so stain travels faster lengthwise than across.
Probably should have opened with this section, honestly. Understanding the enemy before fighting it changes your whole approach. You’re not actually fighting the wood; you’re managing absorption rates so earlywood and latewood take up stain at the same speed.
The Sanding Sequence That Stops Blotching
Proper surface preparation is non-negotiable. This is where blotching gets stopped before it starts.
Start with 80-grit sandpaper if the wood is rough or has old finish. 80-grit removes material fast but leaves deep scratches — and that’s intentional at this stage. Those scratches expose fresh wood fibers and create mechanical key for the next pass. Sand with the grain, using a random orbital sander for large areas or a detail sander for edges and tight spots. Vacuum thoroughly after.
Move to 120-grit next. This smooths out the 80-grit scratches without losing that aggressive mechanical prep. Spend 3–5 minutes per square foot here. The wood should feel noticeably smoother but still have some tooth to it. Vacuum again.
Then 150-grit. You’re refining now. The scratches are microscopic. The goal is uniform texture — no shiny spots, no dull spots. If light bounces differently off different areas, you’ve got uneven sanding. Keep going until the whole surface catches light the same way. Vacuum.
Final pass: 180-grit if you’re using oil-based stain, 220-grit if water-based. Water-based stains raise the grain more aggressively, so finer prep helps. This stage is gentle — you’re not changing much, just polishing the previous work.
Here’s the critical part nobody talks about enough: skipping grits. Jump from 80 to 180 and you’ll miss the intermediate steps that establish uniform surface texture. Those 80-grit scratches telegraph through the stain as darker lines — not because the scratches themselves matter, but because they’re uneven. The intermediate passes standardize them.
After the final sand, raise the grain. Wet the wood with distilled water using a sponge or spray bottle until it’s damp but not dripping — the goal is activating the fibers without soaking deep into the surface. Let it dry completely, 24 hours standard (18 hours works if your shop stays dry). The wood will feel fuzzy. All those fibers lifted up. Sand lightly again with 180 or 220-grit, minimal pressure. You’re just taking off the fuzz, not starting over. Vacuum immediately and don’t let it sit more than a few hours before conditioning or staining.
The grain-raising step separates pro finishers from amateur results. It prevents the first stain coat from lifting fibers and creating that rough, blotchy-looking surface.
Wood Conditioner Application and Timing
Conditioner is a controlled starvation tool — it partially seals the wood so stain absorption becomes uniform instead of chaos.
On softwoods, you’ve got two paths. Path one: commercial pre-stain conditioner. Minwax pre-stain and Varathane both work well. Path two: thin your stain 50–75% with the appropriate thinner — mineral spirits for oil-based, water for water-based. Both approaches reduce pigment absorption so you get even coloring.
Apply conditioner within 24 hours after grain-raising. Brush it on with a natural bristle brush, working it into the grain using long strokes parallel to the grain direction. Don’t puddle it. Aim for a thin, even coat that soaks in within 5–10 minutes. If it’s still glossy after 15 minutes, you applied too much. Wipe excess with a lint-free cloth.
Drying time varies. Oil-based conditioners need 24 hours — full 24, not 23. Water-based versions need 4–8 hours. Mark your calendar. Stain too early and conditioner is still working on absorption, defeating the purpose. Stain too late (several days) and the conditioner effect diminishes.
Some woodworkers skip conditioner on pine, thinking it’ll look too light or they can control absorption with technique alone. Wrong. Conditioner isn’t optional on softwoods — it’s foundational. Tight-grained hardwoods like maple can sometimes get away with a thin first coat instead. Pine cannot. The porosity difference between earlywood and latewood is too extreme.
Why does it work? Conditioner seals the earlywood cells partially, slowing stain penetration. Latewood already resists absorption naturally, so it doesn’t change much. Result: equilibrium. The stain color becomes consistent across the surface.
Stain Application on Prepped Softwood
After all that prep, the actual staining is almost anticlimactic — don’t let it be.
Use a natural bristle brush for oil-based stains, synthetic for water-based. The bristles should be soft enough to hold stain but stiff enough to control application. A 2-inch brush works for general areas, 1-inch for details. Stir the stain thoroughly for 2 minutes, then pour it into a shallow tray or small bucket.
Apply the first coat thinned slightly — about 20% thinner than the product recommends. This is insurance. The conditioner is controlling absorption already, so thin stain reduces over-saturation risk. Brush along the grain with smooth, even pressure. Overlap strokes slightly. The goal is an even film, not puddles. Work in sections: stain one board or panel completely before moving on.
Drying time: follow the label. Oil-based typically needs 4–8 hours between coats; water-based needs 2–4. Don’t rush this. Stain that hasn’t fully cured blurs under a second coat.
Apply a full-strength second coat. Now the conditioner has done its job, and a second coat gives you color depth and evenness. Same technique — grain direction, smooth strokes, controlled pressure. Two coats on softwoods gives richer color and more uniform appearance than a single heavy coat.
A pro tip: thinned first coat, full strength second. This two-stage approach lets conditioner do its work while the thin first coat establishes your color baseline. The second coat builds depth without blotching.
Common Mistakes That Undo Your Prep Work
Blotching still appearing after all this points to a mistake in your process.
Skipping grain-raising is the most common culprit — I see it constantly. People think it’s extra work and skip it to save time. Then the stain raises the grain anyway, but now those raised fibers absorbed stain unevenly. You get a rough, splotchy surface. Grain-raising takes 30 minutes of active work spread over two days. Do it.
Applying conditioner too thick is the second issue. You’re not waterproofing; you’re moderating absorption. A thick conditioner layer stays on top of the wood, and stain sits on top of it instead of penetrating. Result: uneven sheen, possible adhesion problems with topcoats, and blotchy color because you’ve essentially painted conditioner over earlywood while it barely touched latewood.
Uneven brush strokes show up clearly on softwoods. If you stroke one direction on one board and a different direction on the next, light reflects differently and your stain color appears different even though it’s chemically identical. Maintain consistent direction and pressure across all surfaces.
Stain too thick tempts you when you want rich color immediately. Apply heavy stain to pine and earlywood becomes almost black while latewood stays medium brown. It looks marbled, not stained. Thinner coats layer better.
Rushing conditioner dry time is deceptive because the wood *looks* dry before it actually is. The surface is dry, but conditioner is still affecting absorption. Stain while it’s working and you’ve wasted the conditioner step. Wait the full time.
These mistakes don’t mean your project is ruined — they mean starting over on that board. Sand it back to bare wood and restart the sequence. That’s the painful lesson. Prevention through proper process takes time, but correction takes more.



Stay in the loop
Get the latest artisan furniture makers updates delivered to your inbox.