What Actually Causes a Board to Warp After Ripping
Wood warping after a rip cut has started getting harder to follow with all the conflicting advice flying around. As someone who’s spent years standing at the bench answering this exact question, I spent months getting comfortable with stress relief, reaction wood, and why your freshly cut board looks like a potato chip. Today, I will share it all with you.
Most woodworkers blame moisture first. Honestly, that’s the wrong instinct — at least not as the primary culprit. The real story starts before the tree was ever cut down.
A growing tree builds internal stress. Imagine a bent spring being pinned flat by external force. The outer trunk wood experiences compression as the tree grows taller and thicker. The interior experiences tension. When the lumber mill processes that tree, they don’t eliminate this stress. They manage it — carefully controlling how the wood dries to keep everything in a kind of forced equilibrium.
Then you make a rip cut. You’re slicing through material that’s held that equilibrium for years, sometimes decades. The saw removes the outer fibers that were keeping everything in check. What remains wants to move. Grain on one side relaxes while the other side tightens. The board cups, bows, or twists hunting for a new balance. That’s stress relief. It happens at 6% moisture content. It happens at 12%. The moisture number is almost beside the point here.
But what is reaction wood? In essence, it’s the technical term for wood that formed under mechanical stress — tension wood in hardwoods, compression wood in softwoods. But it’s much more than that. In pine and fir, reaction wood shows up on the undersides of leaning trunks and branches. In hardwoods, it’s subtler — hard to spot with the naked eye. The fiber structure is shorter, more chaotic, and holds stress differently than normal straight-grained wood.
This is entirely separate from moisture-related movement. A perfectly dry, acclimated board can warp the instant you make a cut — pure stress relief, nothing else. A board can also sit stable for months and then cup dramatically when winter drops your shop humidity 15 points. Both problems are real. Both need different solutions. That’s what makes the whole subject so maddening to us woodworkers — most articles blur the two together and leave you confused at the saw.
How to Read a Board Before You Make the First Cut
Worth putting near the top. I saved myself from a disaster last month by spending five minutes looking at end grain before I touched the saw. Would have lost 40 board feet of nice white oak otherwise. Avoid the path I took.
So, without further ado, let’s dive in.
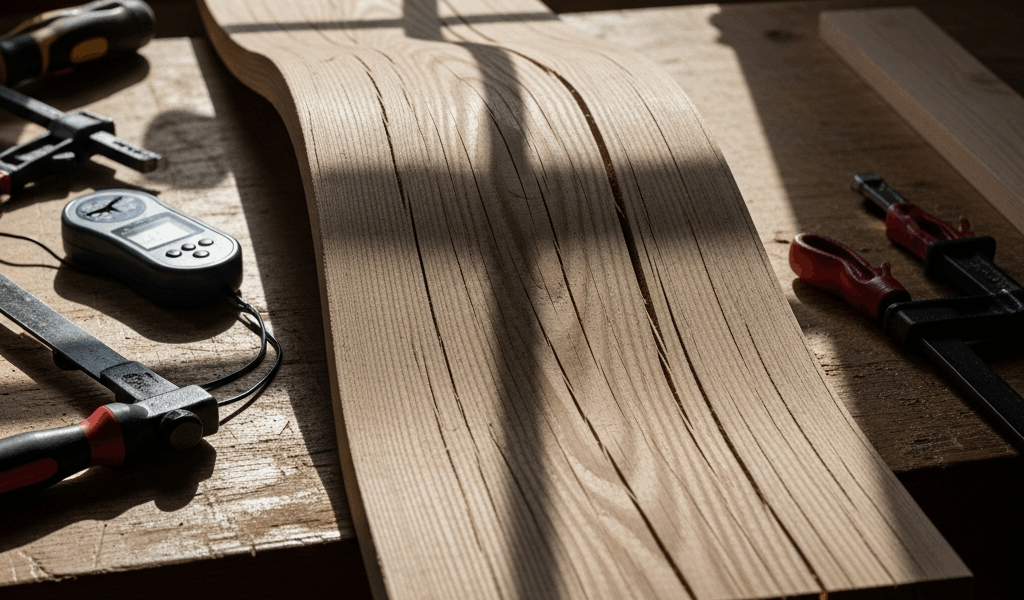
Start at the end of the board. Growth rings tell you almost everything. Flatsawn boards — the most common cut from any mill — have rings running roughly parallel to the face. Those boards will cup when you rip them. Not maybe. Physics. The side with tighter rings shrinks less than the side with wider rings, and the board moves accordingly. Quartersawn boards have rings running perpendicular to the face. Far more stable after ripping. You’ll pay a premium — sometimes 40-50% more per board foot depending on species — but if you’re planning serious rip work, it’s worth every cent.
Before cutting, check for reaction wood. Look for grain running at an angle across the face rather than straight along the length. Look for subtle shifts in sheen or color — sometimes a slightly darker or duller patch compared to the surrounding wood. Run your hand along the edge and feel for grain that seems to change direction under your fingers. These are red flags. A board loaded with reaction wood warps aggressively the second you relieve that stress.
Grain orientation at the cut line matters too. Grain running steeply into the blade causes tear-out on the exit side — a separate problem, but it concentrates stress right where you don’t want it. Sharp blade, proper set on the fence. These things matter.
Pull out a pair of winding sticks — or a straightedge if that’s all you have — and check the board in both directions before you make a single cut. A board that’s already slightly twisted or cupped is already partway through stress relief. Ripping it won’t improve things. Sometimes the right answer is to put the board back in the pile and find another one. That’s not failure. That’s reading the material correctly. That’s what makes this craft endearing to us woodworkers — the wood always has the final say.
Why Moisture Still Plays a Role and How to Check It
Internal stress is the main culprit. But don’t skip this section thinking I’m dismissing moisture — I’m not.
A bone-dry board at 6% moisture content in a conditioned shop will still warp from stress relief when cut. The degree of movement is just smaller. A board at 14% moisture content moves more — and keeps moving for weeks after the cut. I’m apparently sensitive to this after ruining a tabletop panel last winter. A $28 Lignomat Mini-Ligno E/D meter works for me while cheaper pin meters never gave me reliable readings. Test your stock before any rip cuts on critical work.
For interior furniture, target 6-8% moisture content. That’s where wood stabilizes in a normal home running 35-55% relative humidity. Outdoor work or green lumber from the mill — that’s a different game entirely. Green wood warps violently. You will lose that battle every single time. Don’t fight it.
Check moisture at three or four points along the board’s length, not just one end. Uneven drying creates its own internal stress. A board reading 8% on one end and 12% on the other is primed to move on you. Find that variation and let the board sit in your shop for another two to three weeks before cutting. It’s not exciting advice. It works.
Step-by-Step Fixes If the Board Has Already Warped
You already cut the board. It warped. Here’s how to respond based on how bad it actually is.
First, you should measure accurately before doing anything else — at least if you want to avoid wasting time on the wrong fix. Put the board on your bench and lay winding sticks across the surface at two points, then sight along the grain. Twist becomes immediately visible. A barely perceptible warp — under 1/16″ over 24 inches — might actually flatten back out as the board finishes acclimating. Set it aside on a flat surface for a week and recheck before touching it.
For mild bow or cup in the 1/16″ to 1/8″ range, a jointer might be the best option, as removing material is the most reliable fix. That is because you’re not trying to reverse the warp — you’re planing past it to a new flat reference surface. Multiple light passes, not one aggressive cut. No jointer? A No. 7 or No. 8 hand plane works fine. Budget for the material loss before you start.
For moderate warp — 1/8″ to 1/4″ across the length — wetting and clamping is worth trying. Wet the concave face thoroughly, clamp the board flat against a heavy torsion box or your workbench, and let it dry completely in that position. You’re using moisture to encourage the grain structure to resettle. It works sometimes. It doesn’t always hold. Minimum two to three weeks before you release the clamps and check results.
Severe warp — over 1/4″ — accept the situation. Resawing down to thinner stock, say from 3/4″ to 1/2″ or thinner, often flattens things out because there’s simply less mass available to hold the stress. Only works if you have enough thickness to sacrifice. Otherwise the board becomes scrap or firewood. That’s not a pleasant outcome. It’s an honest one.
How to Set Up Your Next Cut to Prevent It Happening Again
Here’s the exact workflow I follow for any rip work on good stock. Nothing exotic. Just discipline.
Acclimate the lumber first. Let it sit in your shop for two to four weeks before cutting — at least if you want predictable results. It needs to reach moisture equilibrium with your shop environment. Rushing this step is gambling with your material.
Check moisture content at three spots along each board. Target 6-8% for interior work. Write the numbers on the end grain in pencil if you’re working with a big stack.
Read the end grain before anything else. Quartersawn is better than flatsawn for rip work. Reaction wood is a warning — note it, account for it, or reject the board entirely.
Make relief cuts on wide panels. Ripping a 12-inch board? Consider breaking it into two 6-inch pieces rather than one continuous pass. The stress relief happens over shorter spans. Movement is less dramatic and easier to manage afterward.
Store ripped boards flat. Not on edge. Not leaning against a wall at 15 degrees. Flat, with 3/4-inch stickers between layers if you’re stacking multiple pieces. This lets the wood move where it’s going to move anyway — gradually, controllably, without locking in a new warp.
Control your shop humidity. While you won’t need a full HVAC overhaul, you will need a handful of basic tools — a hygrometer ($15-20 at any hardware store), a humidifier for winter, and decent ventilation for summer. Extreme seasonal swings cause warp that even perfect quartersawn stock can’t resist.
You cannot prevent stress relief entirely. It’s built into the wood — written into every ring since the tree was a sapling. What you can do is read the material carefully, respect what it’s telling you, and make decisions that keep movement minimal and predictable. That’s the actual difference between a woodworker and someone who just owns tools.


Stay in the loop
Get the latest artisan furniture makers updates delivered to your inbox.